
You pour the pan juices into a pot, whisk hard, and still end up with gravy that looks wrong. That frustration is common and it can wreck a busy Thanksgiving dinner. This guide shows exactly how to make gravy from turkey drippings without the common mistakes. You will learn the simple roasting pan science, a reliable roux ratio, and clear visual doneness cues for a smooth finish. Next, you get a full recipe card, a troubleshooting table, storage rules and five quick answers. The three biggest problems are lumps, a grease slick and a salty finish. Follow these steps and your gravy will turn out silky and balanced every time.
Why This Recipe Goes Wrong
Most failures when learning how to make gravy from turkey drippings come down to starch. Flour clumps when it meets hot liquid. The outer grains gel before water reaches the center, like cocoa powder meeting hot milk. A roux coats each grain with fat first so the gravy stays smooth.
Fat and juices separate as the pan rests. If you never skim the fat, the pan drippings leave a greasy slick. Meanwhile, juices reduce during a long roast, which concentrates the salt. That is why this recipe tastes the liquid first and salts last.
Recipe Card: How to Make Gravy from Turkey Drippings
This card uses a simple roux, a quick deglaze and a gentle simmer. It gives exact amounts, clear times and visual cues. You never have to guess.
Time and Servings
| Detail | Amount |
|---|---|
| Prep time | 10 minutes (includes resting the drippings) |
| Cook time | 15 minutes |
| Total time | 25 minutes |
| Servings | 6 to 8 (about 3 cups of gravy) |
| Difficulty | Easy |
| Equipment | Whisk, medium saucepan, fine-mesh strainer, glass measuring cup |
Ingredients
Drippings are what falls off the bird and pools in the pan below as it roasts: flavorful juices plus melted fat. They also pick up the brown bits and seasonings that stick to the roasting pan. Some cooks simmer the giblets in the broth first for extra depth.
| Ingredient | Exact Quantity (US / Metric) | Why It Matters |
|---|---|---|
| Degreased turkey drippings | 2 cups / 480 ml | Builds the deep roasted flavor |
| Reserved turkey fat or unsalted butter | 4 tablespoons / 56 g | Carries the flour and toasts it into a roux |
| All-purpose flour | 4 tablespoons / 30 g | Thickens the gravy; equal parts fat and flour keep it smooth |
| Low-sodium turkey or chicken broth | 1 cup / 240 ml | Deglazes the pan and stretches the drippings |
| Black pepper | 1/4 teaspoon / 0.5 g | Adds gentle heat |
| Kosher salt | Start with 1/4 teaspoon / 1.5 g, only after tasting | Drippings are often salty already |
| Optional rescue slurry: cornstarch and cold water | 1 tablespoon / 8 g plus 2 tablespoons / 30 ml | Backup thickener if the gravy stays thin |
Cooking for a crowd? Keep the fat and flour equal and scale both up with the liquid.
Step 1. Collect and Degrease the Drippings

Pour the pan juices through a fine-mesh strainer into a glass measuring cup. Let the cup rest 5 to 10 minutes or chill it for 15 minutes. The fat rises to the top. Spoon off 4 tablespoons of fat and set it aside. Keep the clear drippings underneath. Never pour leftover fat down the drain. A fat separator does the same job faster.
Step 2. Deglaze the Pan
If the pan is metal and stovetop-safe, set it across one or two burners over medium-low heat. Pour in 1 cup of warm low-sodium chicken broth. Scrape the brown bits with a wooden spoon for 1 to 2 minutes until they dissolve. Strain that liquid into the cup with the drippings. Then add more broth until you have 3 cups (720 ml) of liquid in total. If the pan cannot go on a burner, pour the hot broth in, scrape right there and strain.
Step 3. Cook the Roux

Heat the reserved fat in a medium saucepan over medium heat. If you have less than 4 tablespoons, add unsalted butter to make up the difference. Stir in the all-purpose flour. Whisk nonstop. After 1 to 2 minutes the roux should foam slightly, smell toasty and turn a light golden brown. A darker roux tastes deeper but thickens less. Stop at light gold for classic turkey gravy.
Step 4. Add the Liquid Slowly
Warm the liquid until hot but not boiling. Pour in 1/2 cup and whisk until a thick, smooth paste forms. Next, add the rest in a thin stream. Keep whisking for 1 minute so no dry flour hides at the edges. This keeps the gravy lump-free. Pro tip: warm the broth in the microwave for 1 to 2 minutes while the roux cooks. Hot liquid blends faster than cold.
Step 5. Simmer Until Thick

Bring the pot to a gentle simmer, roughly 195°F to 205°F (90°C to 96°C), with small bubbles at the edges. If bubbles pop hard, lower the heat. Cook 3 to 5 minutes and stir often. The gravy is ready when it coats the back of a spoon. A finger drawn through the coating should leave a clean line. This is the right consistency. To thicken it further, simmer 1 to 2 more minutes.
Step 6. Season and Serve
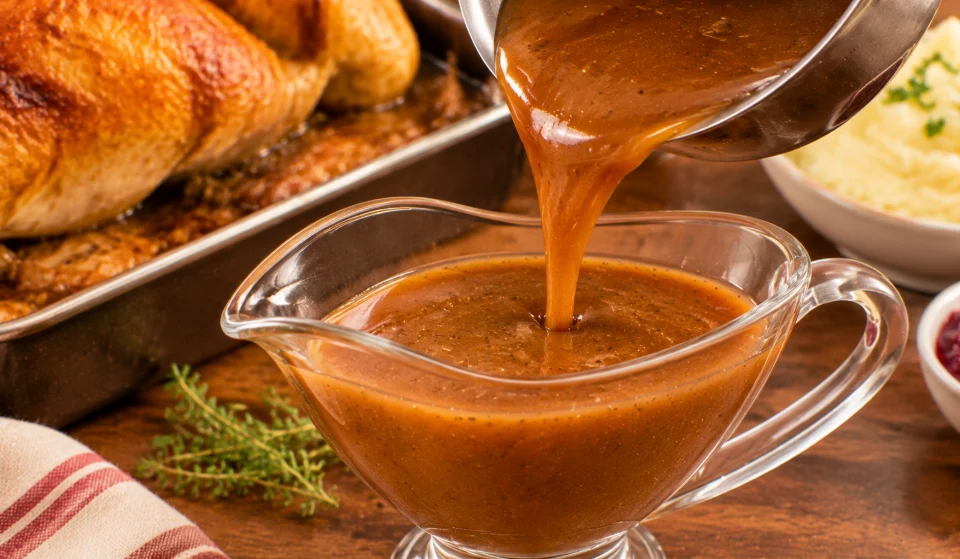
Remove the pot from the heat. Taste first, then add the black pepper and kosher salt in small pinches. Pour the gravy into a warm gravy boat and serve over turkey and mashed potatoes. Follow standard food safety guidance and refrigerate leftovers within 2 hours. Need sides to go with it? Browse Recipely for easy ideas.
Troubleshooting Guide
Even careful cooks hit a snag. Knowing how to make gravy from turkey drippings also means knowing how to rescue it. Most trouble comes down to consistency, grease or salt. Each one has a quick fix. Start with this table, then read the three biggest fixes below.
Once the gravy works, Recipely also has desserts, drinks and quick dishes to round out the holiday table. Fixing the pot first keeps the rest of the meal calm.
| Problem | Likely Cause | Quick Fix |
|---|---|---|
| Lumpy gravy | Adding liquid too fast or too cold | Whisk hard, then strain through a fine-mesh strainer |
| Greasy gravy | Leaving fat in the drippings | Skim with a spoon or drop in 2 ice cubes and lift out the fat that sticks |
| Too salty | Reduced drippings or regular broth | Add unsalted broth or water, 1/4 cup at a time |
| Too thin | Short simmer or too little roux | Simmer 2 to 3 more minutes or whisk in the cornstarch slurry |
| Too thick | Over-reduced gravy or too much flour | Whisk in warm broth, 1 tablespoon at a time |
| Pale or bland | Undercooked roux or skipped deglaze | Add a pinch of pepper, simmer 2 minutes and salt in small pinches |
| Floury taste | Short simmer | Simmer a full 3 to 5 minutes |
| Bitter taste | Burnt bits from the pan | Strain out dark specks and dilute with broth |
How to Fix Lumpy Gravy
Lumps happen when dry flour meets liquid too fast. Pour the gravy through a fine-mesh strainer, then press the lumps with a spoon. A quick whisk or a few seconds with an immersion blender also works. Next time, add the liquid slowly for lump-free gravy.
How to Fix Greasy Gravy
A greasy slick means fat stayed in the pot. Tilt the pan and spoon off the top layer. Alternatively, drop in two ice cubes and lift out the fat that sticks to them. Then whisk well. Next time, skim the fat from the pan drippings before you start.
How to Fix Salty Gravy

Salty gravy usually starts with reduced drippings and regular broth. Whisk in 1/4 cup of unsalted broth or water, then taste. Repeat if needed. Next time, choose low-sodium chicken broth and wait to add kosher salt. Skip the old potato trick, because it removes very little salt.
Cook’s Note
Many cooks find that gravy looks thin in the pan and thick on the plate. As the pot cools, starch keeps swelling. Gravy that coats a spoon at 200°F (93°C) can feel noticeably thicker within 10 minutes. Pull it off the heat while it still pours like heavy cream.
Mistakes to Avoid
Four small habits cause most trouble when people learn how to make gravy from turkey drippings. Fixing them takes seconds and costs nothing.
Skipping the skim. Leftover fat turns gravy greasy and heavy. Let the turkey drippings rest 5 to 10 minutes first. Then spoon off the top layer before you start the roux. That step adds a minute and saves the whole pot. Skipping it is the most common slip.
Dumping the liquid in all at once. Too much liquid at once drowns the whisk and invites lumps. Pour in the first 1/2 cup slowly. Whisk it into a paste. After that, add the rest in a thin stream for a smooth result.
Salting too early. Drippings vary a lot. Some taste mild, while others taste like brine. Always taste after the gravy reaches a simmer. Then add kosher salt in small pinches. You can always add salt but you cannot remove it.
Rushing the simmer. Flour needs 3 to 5 minutes of gentle bubbling to lose its raw taste and reach full thickness. If you wonder how to thicken turkey gravy, patience beats shortcuts. Stir often and let the simmer do the work before you reach for a cornstarch slurry.
Storage and Reheating
Cool the gravy fast. Shallow containers cool faster than deep pots. Then use this table to refrigerate, freeze or reheat it safely.
| Method | Best Practice | How Long |
|---|---|---|
| Cooling | Move leftover gravy to a shallow container and refrigerate within 2 hours | Within 2 hours of cooking |
| Fridge | Airtight container | 1 to 2 days |
| Freezer | Sealed airtight container or ice cube tray for small portions; leave room for expansion | 2 to 3 months for best quality |
| Stovetop reheat | Low heat, whisk often, add a splash of broth if thick; heat to 165°F (74°C) | 5 to 8 minutes |
| Microwave reheat | Cover and stir every 30 to 60 seconds until steaming hot and 165°F (74°C) | 2 to 3 minutes |
| Holding on turkey day | Keep covered on low heat at 140°F (60°C) or above and whisk before serving | No longer than 2 hours |
| Skin or separation | Whisk in a splash of warm broth | About 1 minute |
FAQs
Why is my gravy lumpy?
Dry flour met liquid too quickly or the liquid was too cold. Pour the gravy through a fine-mesh strainer, whisk well and add warm liquid slowly next time.
Can I save gravy that is too thin?
Yes. Simmer it 2 to 3 more minutes first, then whisk in a cornstarch slurry of 1 tablespoon cornstarch and 2 tablespoons cold water. Simmer 1 minute.
What if I do not have enough drippings?
Top up with low-sodium chicken broth until you reach 3 cups of liquid. Taste before adding any salt.
How do I fix bland gravy?
Deglaze the pan so the brown bits flavor the liquid. Then cook the roux to a light golden brown and season in small pinches.
Can I make this gravy ahead of time?
A full make-ahead gravy is not possible because drippings only exist after roasting. Measure everything early. Then make the gravy while the turkey rests 20 to 30 minutes.
Final Thoughts
Now you know how to make gravy from turkey drippings the calm way. Skim the fat, cook the roux, add liquid slowly and simmer long enough. Those four habits fix most problems and give you reliable turkey gravy from drippings every time, even on a busy holiday.
Your next step is simple. Measure the ingredients before the turkey leaves the oven. That way the gravy is ready while the resting turkey sits on the board. Then save this recipe card for your next Christmas dinner.